How to Share Spark Videos on YouTube
This article was written by Monica Burns, Ed.D., and originally published on ClassTechTips.com. Monica is the author of Tasks Before Apps and host of Easy EdTech Podcast. You can follow her work on Instagram and Twitter @ClassTechTips.
I’ve had the pleasure of working with this company. All opinions are my own.
Do you have a YouTube channel for your school or classroom? This past year, I’ve led several presentations on how schools can share their stories. From making a slideshow with pictures from a field trip to spotlighting student work, there are lots of things schools can share with the world. You can share Spark Videos on YouTube this school year!
If you are creating videos to share school updates this year, or your students are creating videos, YouTube is one place to host them. Setting up a school YouTube channel gives you the benefit of organizing all of your videos in one place.
Using Spark Video with YouTube
Regular readers of the blog know I am a big fan of the Adobe Spark tools. You might already have a copy of the book Ben Forta and I wrote all about using Spark with students. It’s called 40 Ways to Inject Creativity into Your Classroom with Adobe Spark.
In this blog post, I’ll take you through the quick steps for sharing an Adobe Spark Video on YouTube. Of course, you don’t need YouTube to share the movies you and your student make. Spark lets you download it to a file for offline viewing, or publish it to a link you can share with anyone.
The benefits of sharing a Spark Video on YouTube include:
- Adding it to a place you already host other videos
- Organizing playlists of videos around one topic
- Creating videos that are discoverable through a YouTube search
- Adding tags or label videos
- Customizing a caption or summary to give more details about the video
Click here to download my free Spark Video graphic organizers.
Sharing Spark Videos on YouTube
Let’s go through the steps for sharing a Spark Video you’ve made on YouTube. Below, you’ll see a series of screenshots from the Chrome browser of my MacBook. The workflow is similar if you are using another device, but the screens might look a little different.
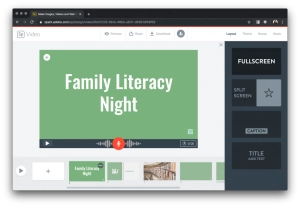
First, open up your finished video project. Then, click on the Download button at the top of the screen to save the video to your device. This option will save the video as an MP4 file, which gives you lots of options for sharing. You then have the choice to share the file in different places, including uploading your video to YouTube.
Then, open up YouTube and sign in to your account. You can either use a Google-hosted account or create a free account. If you would like to share your videos on a school page that you don’t manage, that’s okay. Just send along the video file to the person who manages the school YouTube channel. You’ll also want to send along a title and description for them, too.
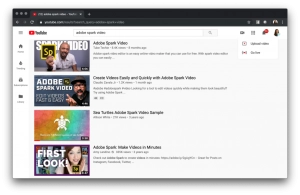
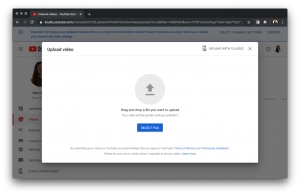
Upload Your Video
In the screenshot above, you can see how the + button which gives you the option to upload a video. There are a few different ways to find the option to upload a video. Depending on your browser, you’ll see this one at the top of your screen as you navigate YouTube.
This option will prompt you to upload a video saved to your device. In my case, the videos I download from Spark go straight to my Downloads folder. Since this is the last file I downloaded, it is right at the top of my list of files.
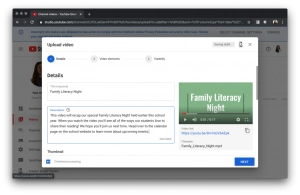
After I select the video, a screen will appear, prompting me to add a bit more information. These options include adding a title and description. The description is the perfect place to summarize what happens in the video. This way, families or anyone who wants to learn more about events at your school will know what each video is about before clicking play.
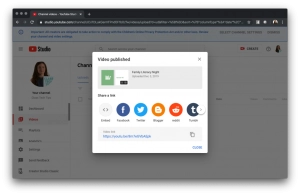
The next two screens will ask questions about who should be able to see your video and if you want to schedule a date for it to release. As soon as it’s ready to go, you will see the link and all of the places you can share the video with just one click.
Remember: when sharing videos with students and student work anywhere online (including YouTube), you want to make sure that everyone in the video has granted permission
Using Playlists to Organize Content
If you are interested in organizing the videos you post into playlists, this podcast episode shares tips for setting this up. A playlist on a school or class YouTube channel makes it easy for viewers to find content related to one category.
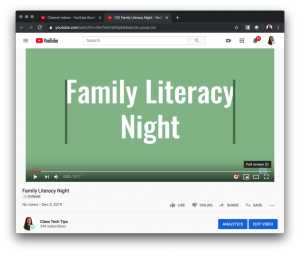
For example, you might make a playlist with Spark Videos that share a recap from a school event. Then someone can play any of the videos in this category. They will get a feel for all of the wonderful activities that take place at your school. In the screenshot below, you can see the Save button. This feature allows you to add the video to a playlist or create a new playlist to include this video.
Alternatively, if you upload a few dozen Spark Video movies from students fourth graders who have just completed book trailers, you can organize this into a playlist too. With this strategy, you can make one playlist full of book trailers. Having a link to a playlist is an excellent option for sharing a handful of videos all at one time. In this case, students can click on the link to the playlist and choose which student-created book trailer they want to watch before picking a new book from the library.
Have you shared Spark Videos on YouTube? Tag @classtechtips on any social sharing! Head over to Adobe Spark’s website to get started creating videos this school year.